How to Clean an Air Fryer Without Harsh Chemicals: My Complete Natural Method That Actually Works
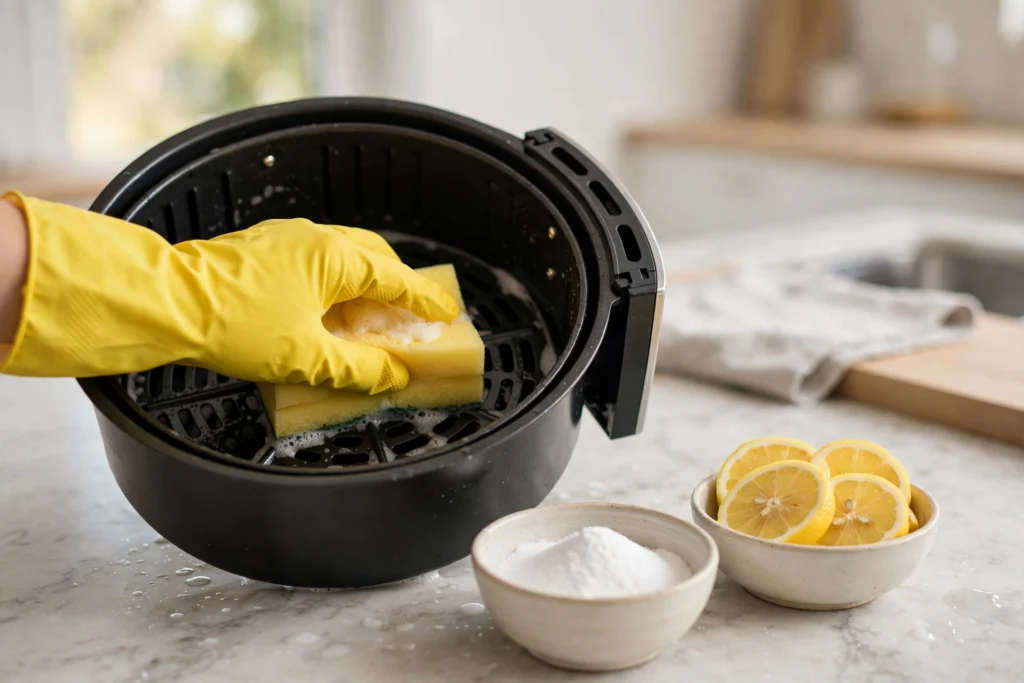
I’ll be honest with you: for the first year I owned my air fryer, I barely cleaned it properly. I’d give the basket a quick rinse, wipe the outside with a damp cloth, and call it a day. Then one evening I noticed my fries tasted faintly like old grease and something vaguely chemical, and I realized the inside of the thing was coated in a sticky brown film that water alone was never going to touch. That’s when I went down the rabbit hole of learning how to clean an air fryer without harsh chemicals — and what I found surprised me. The natural methods don’t just work as well as the chemical ones. In most cases, they work better, and they don’t risk ruining the non-stick coating that makes the air fryer worth owning in the first place.
If you’ve been putting off a proper clean because you’re worried about damaging your appliance or you don’t want chemical residue anywhere near your food, this guide is for you. Everything below is what I actually do in my own kitchen, with ingredients that were already in my pantry.
Table of Contents
Why I Stopped Using Chemical Cleaners on My Air Fryer
Here’s the thing most people don’t realize until it’s too late: the inside of your air fryer basket is coated with a non-stick layer, and harsh chemical cleaners — oven cleaner, bleach, heavy-duty degreasers — eat away at that coating. I learned this the embarrassing way. Early on, I sprayed a well-known kitchen degreaser into my basket, let it sit, and scrubbed. It got the grease off, sure. But within a month, food started sticking to the basket like glue, and little flakes of the coating began peeling. I’d traded a dirty air fryer for a damaged one.
Beyond the coating issue, there’s the residue problem. An air fryer cooks by blasting super-heated air around food in a small enclosed space. Any chemical residue left on the surfaces gets heated up right alongside your dinner. I don’t know about you, but the thought of my kids’ chicken nuggets picking up traces of oven cleaner is enough to make me stick with pantry ingredients forever.
Food writers have flagged the same concern — Chowhound has a good breakdown of the cleaning mistakes that damage air fryers over time, and avoiding harsh chemicals is right at the top of their list. The consensus from manufacturers is the same: warm water, mild dish soap, and a soft sponge handle nearly everything.
What You’ll Need (Nothing Fancy)
Forget the special appliance-cleaning aisle. Here’s my entire kit, and I bet you own all of it already:
- Mild dish soap (the regular kind, nothing antibacterial or extra-strength)
- Baking soda
- White vinegar
- A soft sponge or microfiber cloth (never the scratchy side)
- An old soft toothbrush for crevices
- Paper towels
- A lemon (optional, but great for smells)
That’s it. No sprays, no foams, no gloves required — though I do wear them because dishwater wrecks my hands, not because any of this is dangerous.
The Everyday Clean: My 5-Minute Routine After Cooking
This is the habit that changed everything for me. If you do this after every use, you’ll almost never need a deep clean. It takes five minutes while the air fryer is still slightly warm (not hot — warm).
First, unplug the air fryer and let it cool until you can comfortably touch the basket, usually about 10 minutes. Pull out the basket and the crisper plate or tray. Shake any loose crumbs into the bin — I keep a small bowl by the stove just for this.
Fill your sink with warm (not boiling) water and a squirt of dish soap. Drop the basket and tray in and let them soak for 5 to 10 minutes while you eat. Honestly, this soaking step does 80% of the work. When you come back, most of the grease will have loosened on its own. Wipe everything with the soft side of the sponge, rinse with warm water, and set the pieces on a dish rack to air dry completely before reassembling.
For the interior chamber, wipe it down with a damp microfiber cloth with a drop of dish soap, then go over it once more with a clean damp cloth to remove any soap. And the exterior? A quick wipe with the same cloth keeps it looking new. Done. Five minutes, no chemicals, no scrubbing marathons.
The Deep Clean: Tackling Baked-On Grease Naturally
Sooner or later — especially if you cook a lot of marinated wings or anything with sugary glazes — you’ll face baked-on grease that the everyday routine can’t handle. Here’s my natural deep-clean method, which has never failed me.
Start the same way: unplug, cool, remove the basket and tray. This time, soak them in hot soapy water for a full 20 to 30 minutes. While they soak, make your secret weapon: a paste of baking soda and water. I use about three tablespoons of baking soda with just enough water to make something the consistency of toothpaste.
Pull the pieces out of the soak and spread the baking soda paste over the stubborn spots. Let it sit for 15 minutes. Baking soda is mildly abrasive — enough to lift carbonized grease — but far gentler than any chemical degreaser, and it won’t harm the non-stick surface when used as a soft paste rather than a dry scrub. After 15 minutes, go over the paste gently with your soft sponge. You’ll feel the grease releasing. Rinse thoroughly with warm water.
For the interior of the unit, dampen your cloth, pick up a little of the baking soda paste on it, and wipe the walls gently. Then wipe everything down twice with a clean damp cloth — you want zero paste residue left behind. I finish by running the empty air fryer at 200°C (about 400°F) for 3 minutes, which evaporates any lingering moisture. It comes out smelling fresh and looking nearly new.
How to Clean the Heating Element Without Damaging It
The heating element — that coil at the top of the cooking chamber — is the part everyone forgets, and it’s the part that causes that acrid burning smell when grease drips up onto it. Cleaning it requires a light touch because it’s the most delicate part of the machine.
Unplug the unit and turn it upside down so you can see the element clearly. Take your soft toothbrush, dip it in warm soapy water, and gently brush away any visible crumbs or grease spots. For anything stuck on, dab a tiny amount of baking soda paste onto the spot with your fingertip, wait five minutes, then gently wipe with a damp cloth. Never pour water on the element, never use anything metal on it, and never spray anything directly into the chamber.
Once it looks clean, turn the unit right-side up and let it air dry for at least an hour before using it. I usually do this part in the morning so it’s bone dry by dinner.
Getting Rid of Lingering Smells for Good
If your air fryer smells like last week’s fish no matter how clean it looks, here’s my two-step deodorizing routine. First, wipe the interior with a cloth dampened with a 50/50 mix of white vinegar and water. Vinegar neutralizes odor molecules rather than masking them. Wipe once more with plain water so no vinegar smell remains.
Second, the lemon trick: cut a lemon in half, place both halves in the basket, and run the air fryer at 180°C (350°F) for about 5 minutes. Your kitchen will smell amazing, and any remaining odor inside the unit will be gone. I do this roughly once a month, or after cooking anything particularly pungent. It’s also a nice little ritual — if you’re into kitchen tips the way I am, you’ll enjoy my food and kitchen guides too.
The Mistakes That Ruin Non-Stick Coating
I’ve made most of these, so learn from my pain:
Using metal utensils or steel wool. Even once can scratch through the coating. Stick to wood, silicone, and soft sponges — always.
Spraying aerosol cooking spray directly into the basket. This one surprised me. Aerosol sprays contain propellants and emulsifiers that bake onto the non-stick surface at high heat and build up into a gummy layer that’s nearly impossible to remove. If you need oil, brush it on with a silicone brush or use a non-aerosol mister.
Soaking the main unit in water. The basket and tray can soak. The main unit with the electronics and heating element absolutely cannot. Damp cloth only.
Putting it away wet. Trapped moisture leads to musty smells and, over time, can affect the electrical components. Always air dry completely.
Using the dishwasher for everything. Check your manual — many baskets are technically dishwasher-safe, but the harsh detergents and high heat of dishwashers wear down non-stick coatings much faster than hand washing. I hand wash mine; it takes five minutes and the coating has lasted years.
My Weekly Maintenance Schedule (So It Never Gets Gross)
Here’s the simple rhythm I follow, and my air fryer has stayed in great shape for over two years:
- After every use: the 5-minute routine (soak basket and tray, wipe interior and exterior).
- Once a week: quick check of the heating element for buildup, wipe the vents and crevices with the toothbrush.
- Once a month: the full deep clean with baking soda paste, plus the lemon deodorizing run.
That’s genuinely all it takes. The secret isn’t some miracle product — it’s consistency with gentle methods.
Conclusion
Learning how to clean an air fryer without harsh chemicals turned out to be one of those small kitchen upgrades that pays off every single day. My food tastes cleaner, the non-stick coating has lasted far longer than it did when I was using chemical sprays, and I never have that nagging worry about residue. The whole system runs on dish soap, baking soda, vinegar, and a lemon — things I already buy anyway.
Start with the 5-minute routine after your next cook. Once that becomes habit, the deep clean becomes a rare, easy event instead of a dreaded chore. Your air fryer (and your taste buds) will thank you.
Frequently Asked Questions
Can I use vinegar to clean my air fryer?
Yes, diluted white vinegar (a 50/50 mix with water) is safe for wiping the interior and excellent for removing odors. Just wipe once more with plain water afterward so no vinegar smell lingers, and never pour vinegar directly onto the heating element.
Is baking soda safe for non-stick air fryer baskets?
Yes, when used as a soft paste with water and applied gently with a sponge. Don’t use dry baking soda as a scouring powder or scrub aggressively — the paste form is gentle enough to lift grease without scratching the coating.
How often should I deep clean my air fryer?
For most households, a baking soda deep clean once a month is plenty, as long as you’re doing the quick 5-minute clean after every use. If you cook greasy or sugary foods daily, every two to three weeks is a better rhythm.
Can I put my air fryer basket in the dishwasher?
Many manufacturers say it’s dishwasher-safe, but I don’t recommend it. Dishwasher detergents are harsh and the high heat cycle wears down non-stick coatings much faster than gentle hand washing, which only takes a few minutes.
Why does my air fryer smell like burning plastic?
A burning smell usually means grease or food particles have baked onto the heating element. Clean the element gently with a soft toothbrush and soapy water as described above. If the smell persists and the unit is new, run it empty for 10 minutes before first use — new units sometimes have a factory coating that burns off.