How to Remove Rust From Tools: 9 Methods That Saved My Grandad’s Old Toolbox
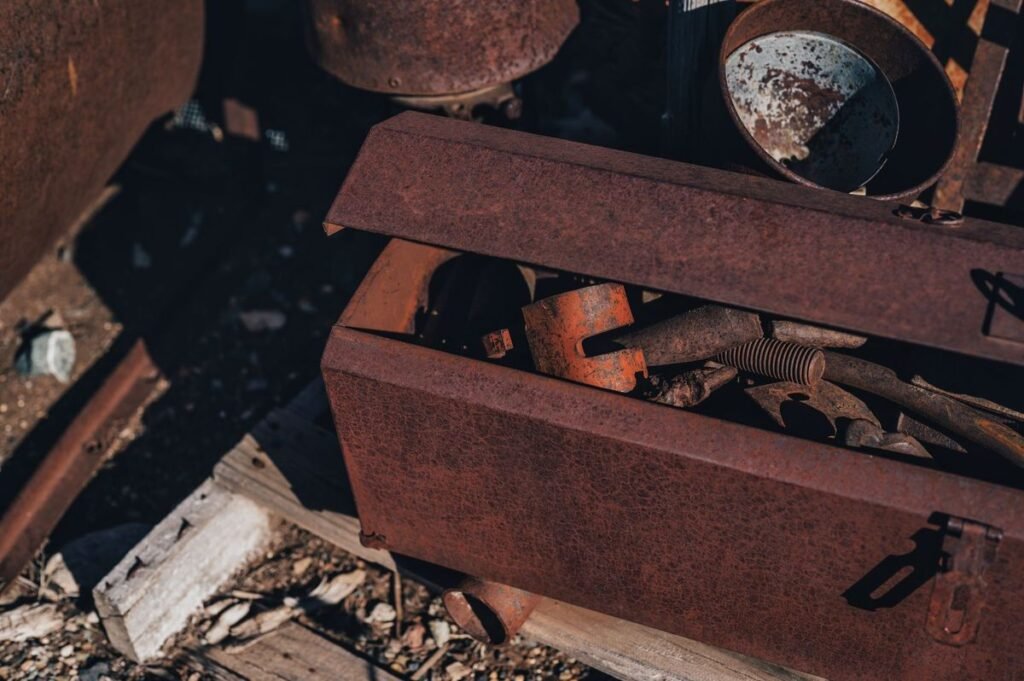
I learned how to remove rust from tools the hard way — standing in my grandad’s damp garden shed, staring at a toolbox full of spanners and chisels that had gone the colour of old pennies. He’d left me the lot when he moved into a flat, and my first thought was honestly to bin the worst of them. The second thought was that he’d kept those tools for forty years, and I wasn’t about to throw them away without a fight.
So I spent a weekend experimenting. Vinegar, baking soda, wire brushes, a bucket of something that fizzed alarmingly — I tried the lot. And here’s the thing nobody tells you: removing rust from tools is not one job, it’s several small ones, and the right method depends entirely on how bad the rust is and what the tool is made of. A light orange dusting on a screwdriver needs a completely different approach from a spanner that’s been sitting in a puddle for a year.
By the end of that weekend, most of grandad’s tools looked almost new. A couple were beyond saving, and I’ll tell you how to spot those too, so you don’t waste an afternoon on a lost cause. Whether you’ve inherited a rusty toolbox, left your garden tools out in the rain, or just found your favourite secateurs looking sorry for themselves, this guide covers the nine methods that actually worked for me — cheapest first, heavy-duty last — plus the simple habits that stop rust coming back.
Table of Contents
How to Remove Rust From Tools: Start by Knowing What You’re Dealing With
Before you reach for anything, take a proper look at the tool. Rust comes in three rough stages, and knowing which one you’re dealing with saves you time and effort.
Surface rust is the orange-brown dust that wipes off on your fingers. It looks worse than it is — the metal underneath is usually fine, and a mild method like a vinegar soak or a baking soda paste will clear it in minutes. Most tools you find in a shed fall into this category.
Scale rust is thicker and flakier. It feels rough, it pits the surface slightly, and it won’t wipe off. You’ll need something more aggressive here: a wire brush, a citric acid bath, or a commercial rust remover. The tool is still very much saveable at this stage.
Deep rust is the scary one. The metal is pitted, flaking away in layers, and in the worst cases the tool has lost its shape — a chisel edge that’s crumbled, a spanner jaw that’s thinned out. If the tool has lost structural strength, no amount of cleaning will bring it back safely. I’ll cover how to make that call later in this guide.
One more check before you start: what is the tool made of? Most hand tools are carbon steel or chrome-vanadium steel, and everything in this guide works on those. But if you’re dealing with a tool that has a chrome-plated finish, go gentle — aggressive wire brushing will strip the chrome along with the rust. And never use the acid methods on tools with wooden handles unless you keep the handles out of the liquid, or you’ll end up with swollen, cracked wood.
What You’ll Need Before You Start
You don’t need a workshop full of gear. For most of the methods below, you probably already have half of what you need in the kitchen. Here’s my basic kit: white vinegar (the cheap stuff, not malt vinegar); baking soda and table salt; lemons or citric acid powder; an old toothbrush and a wire brush (brass bristles for delicate work, steel for stubborn rust); steel wool, fine grade (0000) and medium grade (0); a plastic bucket or tub big enough to submerge your tools; rubber gloves and safety glasses; old rags and paper towels; mineral oil, camellia oil, or even 3-in-1 oil for aftercare; sandpaper in a few grits (120, 220, 400) for flat surfaces.
Safety first, and I mean it. Wear the gloves and glasses, especially with the acid methods and the wire brush — a wire bristle in the eye is a hospital trip. Work outside or in a well-ventilated space when you’re using vinegar or citric acid in any quantity, because the fumes are unpleasant and the smell lingers. And keep everything away from children and pets. It sounds dramatic for a bit of rust, but a bucket of vinegar with a battery charger clipped to it (that’s the electrolysis method — more on that later) deserves respect.
Method 1: The White Vinegar Soak
This is where I always start, and honestly, it’s where most people should start too. White vinegar is cheap, it’s in every supermarket, and it eats light-to-medium rust surprisingly well. The acetic acid in the vinegar dissolves iron oxide — the rust — while leaving the healthy steel underneath mostly alone.
Pour enough white vinegar into a plastic tub to fully cover the rusty parts of the tool. If the tool has a wooden handle, prop it up so only the metal is submerged — I rest handles on the rim of the bucket with the head hanging down. Leave it for anywhere from one hour for light rust to a full 24 hours for heavier stuff. I check every few hours and give the tool a scrub with an old toothbrush to see how it’s going.
You’ll know it’s working when the vinegar turns a murky orange-brown colour. That’s the rust coming off into the liquid, which is exactly what you want. Once the rust is gone, pull the tool out, rinse it under clean water, and dry it immediately and thoroughly. This is the critical bit: a freshly cleaned tool will start rusting again within hours if you leave it damp. I dry mine with a rag, then give them ten minutes in a warm oven at low heat or a blast with a hairdryer to make sure every trace of moisture is gone.
One warning: don’t leave tools in vinegar for days on end. After about 24 hours the acid starts pitting the healthy steel, and you’ll end up with a rougher surface than you started with. Vinegar is a tool, not a storage solution.
Method 2: Baking Soda Paste for Light Rust
If the rust is light — that orange dusting stage — you don’t need to soak anything. Make a thick paste of baking soda and a little water, roughly three parts soda to one part water, and spread it over the rusty area. Leave it for an hour or two, then scrub with an old toothbrush or a bit of steel wool.
This is my favourite method for tools I actually like, because it’s the gentlest of the lot. Baking soda is mildly abrasive and mildly alkaline, so it lifts surface rust without eating into the metal. It’s also the method I use on my secateurs and my good kitchen knives when they’ve picked up a spot of rust — anything where I care about the finish.
The downside is that it won’t touch scale rust. If you scrub for five minutes and the rust is laughing at you, move on to one of the stronger methods below. There’s no prize for persistence with the wrong technique.
Method 3: Lemon and Salt Scrub
This one smells nicer than the vinegar method, which counts for something when you’re working in the kitchen. Cut a lemon in half, sprinkle coarse salt generously over the rusty area, and scrub with the cut side of the lemon. The citric acid in the lemon dissolves the rust, and the salt acts as a gentle abrasive.
Leave the salted lemon juice sitting on the tool for an hour or two if the rust is stubborn, then scrub again and rinse. It works best on flat surfaces — spanner faces, the flat of a chisel, a trowel blade — where the salt can sit in place. On round or awkward shapes it tends to slide off, and that’s when I switch to the citric acid bath in method five, which is basically this idea scaled up.
Is it as effective as vinegar? For light rust, yes, and it’s a good option if you don’t have vinegar in the house. For anything heavier, vinegar wins.
Method 4: Wire Brush and Steel Wool
Sometimes chemistry isn’t the answer and you just need to get physical. A wire brush is the fastest way to knock loose, flaky rust off a tool, and it’s the method I reach for when a tool is too big to soak — a spade, a long-handled lopper, a garden fork.
Use a brass-bristle brush on anything with a decent finish you want to keep, and a steel-bristle brush on the truly crusty stuff. Work in one direction where you can, and keep the pressure steady rather than frantic. Follow up with steel wool — medium grade first, then fine grade — to smooth the surface back down. The fine 0000 steel wool is brilliant for the final pass; it leaves a surprisingly smooth finish.
The trade-off is that wire brushing removes a thin layer of metal along with the rust, so it’s not the method for precision tools or anything with a fine edge. And it throws rust dust everywhere, so wear the safety glasses and a dust mask, and do it outside. I learned that one the hard way after brushing a spade in the garage and finding orange dust on everything I owned.
Method 5: Citric Acid Bath
Citric acid powder is the quiet hero of rust removal. You can buy a bag of it cheaply online or in the baking aisle of a big supermarket, and a few spoonfuls dissolved in warm water makes a bath that strips rust faster than vinegar and with less smell.
Mix about three or four tablespoons of citric acid per litre of warm water in a plastic tub, submerge the tools, and leave them for a few hours. I usually check after two hours. The solution will turn orange as the rust dissolves, just like vinegar, but the finish it leaves is noticeably smoother. Where vinegar can leave a slightly rough, grey surface, citric acid tends to leave the metal clean and bright.
This is my go-to for anything with fiddly shapes — pliers with joints, adjustable spanners, anything with a mechanism — because the liquid gets into every crevice that a brush can’t reach. Rinse thoroughly afterwards, dry immediately, and oil the joints while you’re at it, since the bath strips away any old lubricant along with the rust.
Method 6: A Commercial Rust Remover
There are times when the home remedies aren’t enough and you just want something that works without a chemistry experiment. Commercial rust removers like Evapo-Rust are designed for exactly this job: you pour it in a tub, drop the tools in, and wait. No fumes, no acids eating your skin, no mess.
They’re more expensive than vinegar, obviously — a bottle costs a few pounds — but the liquid is reusable. You can pour it back in the bottle and use it again until it stops working, which makes it reasonable value if you have a whole toolbox to rescue. I used it on a set of grandad’s socket wrenches that the vinegar soak hadn’t fully cleared, and they came out looking genuinely new.
The one thing to watch: some commercial removers leave a dark, almost black finish on the steel. It’s harmless — it’s a phosphate coating that actually protects against future rust — but if you want a bright metal look, you’ll need a final polish with fine steel wool. Read the label before you buy, and follow the soaking times it gives you.
Method 7: Electrolysis for Heavily Rusted Tools
This is the heavy artillery, and it’s the method that feels most like magic. Electrolysis uses a low-voltage electric current to pull rust off the metal and onto a sacrificial piece of scrap steel. It sounds complicated, but the setup is simple: a plastic tub, water, a spoonful of washing soda (sodium carbonate, not baking soda), a battery charger, and a scrap piece of steel.
Fill the tub with water, stir in the washing soda, and hang the rusty tool in the water from a wire so it’s not touching the bottom. Hang a piece of scrap steel — an old brake disc, a bit of rebar — in the water too, a few inches away. Clip the negative lead of the battery charger to the tool and the positive lead to the scrap steel. Set the charger to its lowest setting, switch it on, and walk away. Bubbles will rise from the tool within minutes, and over a few hours the rust literally lifts off.
I won’t pretend this is a beginner method — you’re mixing water and electricity, so you need to be careful. Work outside, keep the charger dry and well away from the tub, never touch the water while the power is on, and don’t use a stainless steel scrap piece (it releases toxic chromium into the water). But for a tool that’s deeply rusted and too precious to lose, nothing else comes close. I saved a beautiful old hand plane this way that every other method had failed on. The rust came off in sheets, and the metal underneath was untouched.
Method 8: Sandpaper Progression for Flat Surfaces
For flat blades — chisels, plane irons, trowels, the face of a hammer — sandpaper is often the simplest and most controlled method. Start with a coarse grit like 120 to cut through the rust, then work up through 220 and 400 to smooth the surface back out. Use the sandpaper wet with a drop of oil or water, and keep it flat against the surface so you don’t round off edges that should stay sharp.
This method gives you the most control of any on this list, which is why it’s my choice for anything with an edge that matters. A chisel that’s been sanded back through the grits can be resharpened to a better edge than it had before it rusted. The downside is that it’s slow, and it’s useless on anything with a complicated shape. But for flat steel, nothing beats it for precision.
A tip from my grandad’s own notebook, which I found in the toolbox: wrap the sandpaper around a flat block of wood. It keeps the pressure even and stops your fingers from wearing through the paper in five minutes. He was right, as usual.
Method 9: WD-40 and Scotch-Brite for Quick Touch-Ups
Not every rust job deserves a full soak and a chemistry lesson. If you’ve caught the rust early — a few spots on a tool you use every week — spray the area with WD-40, leave it for ten minutes, and scrub with a Scotch-Brite pad or fine steel wool. The WD-40 loosens the rust and lubricates the scrubbing, and the whole job takes five minutes.
This is maintenance, really, more than restoration. I do it to my garden tools every month or so through the winter, and it keeps the rust from ever getting a proper hold. It’s also the method for tools that are already in regular use — the ones that live in the garage and get handled every weekend. A quick spray and scrub after use, a wipe with an oily rag, and back on the hook. Ten minutes of habit saves you a whole weekend of rescue work later.
How to Stop Rust Coming Back
Removing rust is only half the job. If you put a clean tool back into the same damp shed in the same leaky toolbox, you’ll be doing this all over again in six months. Rust needs three things: iron, oxygen, and water. You can’t remove the iron or the oxygen, so you take away the water.
First, dry every tool before you put it away. Not “mostly dry” — dry. A quick wipe with a rag after use is the single most effective habit in this entire guide. Second, give the metal a light coat of oil. I keep a rag with a few drops of mineral oil or camellia oil in the toolbox and wipe each tool over before it goes back. It takes seconds and it works — the oil blocks moisture from reaching the steel.
Third, fix the storage. A toolbox with a lid that actually closes, a shed that doesn’t leak, a few silica gel packets in the drawer — these are boring solutions and they work brilliantly. I keep a couple of those little silica packets that come in shoe boxes and electronics packaging, and I toss them in the toolbox. They absorb the damp that gets in on humid days.
And here’s a trick my grandad swore by: a chalk stick in the toolbox. Chalk absorbs moisture from the air, and it’s cheap enough to replace every few months. Whether it’s the chalk or the oiled rag that does the most work, I honestly can’t say — but his tools stayed rust-free for decades, so I’m not arguing with the system. For more cleaning know-how around the house, my guide on how to clean white sneakers uses the same principle: gentle methods first, and protect the surface afterwards so the dirt — or the rust — doesn’t come straight back.
When a Tool Is Beyond Saving
I said I’d tell you how to spot a lost cause, so here it is. A tool is done when the rust has eaten so deep that the metal has lost its strength. The signs: the tool bends or flexes where it shouldn’t, the metal flakes away in layers when you poke it, a cutting edge crumbles instead of sharpening, or a spanner jaw has thinned so much that it slips off nuts. If a tool fails any of those tests, retire it. A spanner that slips under load is a trip to A&E waiting to happen.
Sentimental value complicates this, obviously. Grandad’s favourite hammer had a head so pitted that the striking face was like the surface of the moon. I cleaned it, oiled it, and put it on a shelf — it looks great there, and it will never hit another nail. That’s a perfectly good fate for a tool that’s earned its retirement. Just don’t confuse a display piece with a working tool.
The other lost cause is economics. If a cheap screwdriver costs less than the vinegar, the citric acid, and the hour of your time, buy a new one. Save the rescue missions for tools worth saving: the quality ones, the inherited ones, the ones they don’t make like that anymore.
A rusty toolbox isn’t a disaster, it’s a weekend project — and a satisfying one. Start with the gentlest method that fits the rust you’re looking at: baking soda paste or a vinegar soak for surface rust, citric acid or a wire brush for the stubborn stuff, and electrolysis when a tool is worth the extra effort. Dry everything properly, oil it, store it somewhere dry, and you won’t be repeating the job next year.
Grandad’s toolbox sits in my garage now, and every tool in it works. The spanners are clean, the chisels are sharp, and the hand plane I rescued with electrolysis is the one I reach for first. If you’ve got a rusty tool of your own sitting in a shed somewhere, pick the method that fits, give it an afternoon, and see what you can bring back. You might be surprised — I certainly was.
For light surface rust, one to three hours is usually enough. Heavier rust needs 12 to 24 hours. Check every few hours and remove the tool as soon as the rust is gone — leaving it in vinegar for days will pit the healthy steel underneath.
WD-40 helps loosen light rust and makes scrubbing easier, but it doesn’t dissolve rust on its own. Spray it on, wait ten minutes, then scrub with a Scotch-Brite pad or fine steel wool. For anything more than light surface rust, use a vinegar or citric acid soak instead.
White vinegar is safe for steel tools if you don’t overdo it. Soaks of up to 24 hours are fine. Longer soaks can pit the surface, and vinegar will damage wooden handles, so keep handles out of the liquid. Always rinse and dry tools thoroughly after a vinegar soak.
For garden tools like spades and forks, start with a wire brush to knock off loose rust, then use a vinegar soak or citric acid bath for what’s left. Dry them completely and wipe with an oily rag before storing — garden tools rust fastest because they’re constantly exposed to damp soil.
Yes, with care. You need a plastic tub, water, washing soda, a battery charger and a scrap steel anode. It’s the most effective method for deeply rusted tools, but you’re mixing water and electricity, so work outside, keep the charger dry, never touch the water while the power is on, and never use stainless steel as the anode.
Dry tools fully before storing, wipe metal surfaces with a light coat of mineral or camellia oil, and store them somewhere dry with silica gel packets or a chalk stick in the toolbox to absorb moisture. A quick wipe after each use matters more than any single cleaning method.